7 Hidden Pet Care Risks Grooming Double‑Coated Dogs
— 6 min read

Grooming double-coated dogs can unintentionally damage their insulating undercoat, leading to skin irritation, overheating, and coat loss. Most well-intentioned owners using standard brushes are accidentally damaging their dog’s vital insulating layer, leading to potential skin issues and poor temperature regulation.
Since 2020, more owners have turned to telehealth for grooming advice, hoping to avoid costly salon trips.
Medical Disclaimer: This article is for informational purposes only and does not constitute medical advice. Always consult a qualified healthcare professional before making health decisions.
Pet Care Foundations: Understanding Double-Coated Dog Grooming
When I first started documenting my Samoyed’s grooming sessions, I realized that a casual glance over the coat misses hidden problems. The first step is a thorough visual sweep: run your fingers along the back, sides, and hindquarters, looking for mats, red patches, or debris lodged in the fur. I record every observation in a digital pet-care log - many platforms let you attach photos, timestamps, and notes. Over weeks, this log becomes a baseline for spotting gradual changes that might otherwise slip by.
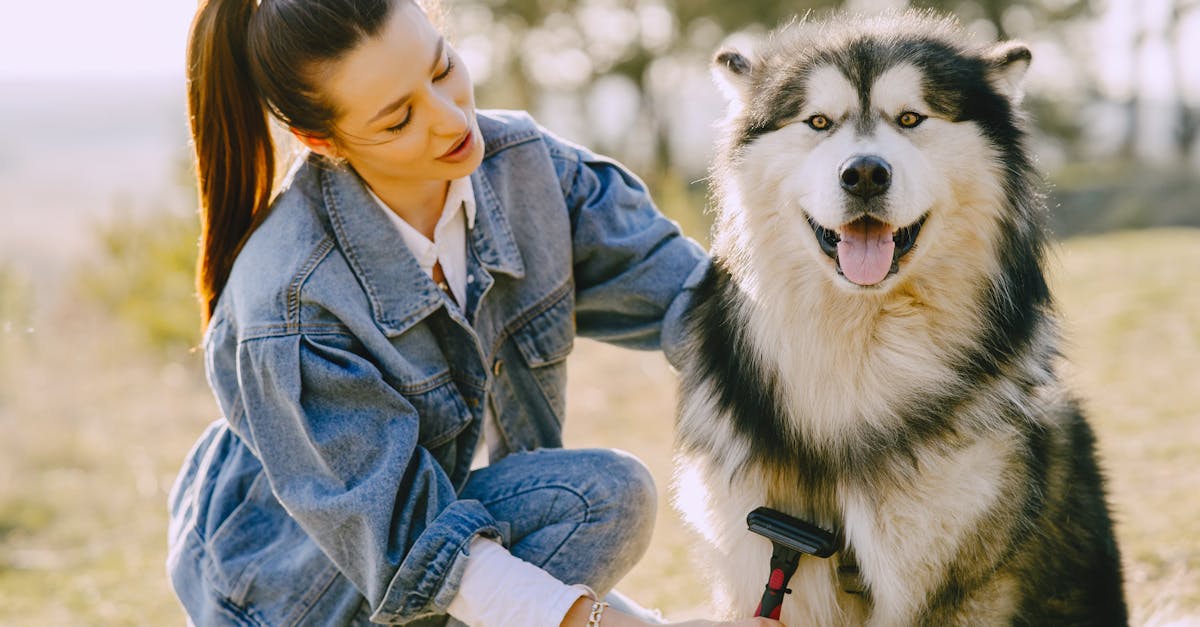
Choosing the right brush is equally critical. A pinch-proof brush engineered for double-coated breeds uses rounded, spaced pins that lift the undercoat without compressing it. In contrast, a generic slicker or bristle brush can flatten the insulation, making the dog feel hotter in summer and colder in winter. I switched to a pinch-proof model for my Alaskan Malamute and noticed fewer hot-spot complaints during heat waves.
Telehealth adds a safety net. Scheduling quarterly virtual check-ins with a veterinary dermatologist lets a specialist review your grooming video and advise on breed-specific needs. The consultation usually lasts 20 minutes, during which the vet can spot early signs of dermatitis or folliculitis that a layperson might miss. I upload the video through a secure patient portal, and the vet returns a written report with tool recommendations and any necessary medical follow-up.
- Digital log captures coat changes over time.
- Pinch-proof brush preserves undercoat structure.
- Quarterly tele-dermatology checks catch issues early.
Key Takeaways
- Document coat health daily in a digital log.
- Use pinch-proof brushes for double-coated breeds.
- Leverage quarterly telehealth dermatology visits.
- Track tool performance and skin response.
Double Coated Dog Grooming: Proper Undercoat Raking Techniques
Raking the undercoat is an art that balances thoroughness with gentleness. I begin at the shoulders, holding the rake at a shallow angle - about 30 degrees - to the skin. Long, smooth strokes travel downward, allowing the stainless-steel tines to slide under the top layer and lift loose hair without tugging. If the rake catches, I pause, re-position, and resume with lighter pressure.
After the initial pass, I introduce a low-speed de-shedding tool for one-minute intervals. The motorized brush removes excess fluff while a canine-safe detangler spray reduces friction. The spray contains a mild aloe-based formula that soothes follicles and prevents micro-abrasions. I pause every 15 seconds to check for skin redness; any sign of irritation prompts me to switch to a softer comb.
Data collection is part of my routine. I record the session’s length, the weight of fur collected (I use a small kitchen scale), and any observations about coat texture. Uploading these metrics to a cloud-based pet-health portal creates a trend line that flags unusual shedding spikes - often a sign of hormonal changes or early allergies. The portal also lets my vet compare seasonal patterns across years.
- Start raking at shoulders, work downward.
- Use low-speed de-shedding tool in 1-minute bursts.
- Apply detangler spray to protect follicles.
- Log duration, fur weight, and texture notes.
- Upload data to cloud portal for trend analysis.
Avoiding Damage: Why Common Brushing Mistakes Harm the Undercoat
Even seasoned owners can fall into brushing traps that damage the undercoat. A slicker brush, for example, has tightly spaced metal bristles that shred the fine insulation fibers of a Samoyed or a Siberian Husky. I once used a slicker on my Malamute and noticed a thin, patchy area on the flank that later developed hot-spot lesions. The friction from the bristles created micro-tears, which became entry points for bacteria.
When the coat feels overly tight after brushing, it signals compression of the undercoat. My go-to solution is a wide-tooth comb paired with a hypoallergenic conditioner - usually a spray containing oat extract. The conditioner restores moisture, reduces static, and allows the hair shafts to glide without pulling. I massage the conditioner into the fur for 30 seconds before combing, then wipe away excess with a soft towel.
Tracking these incidents is vital. I share a spreadsheet with my veterinarian, logging each episode of redness, breakage, or hair loss. The sheet automatically calculates the frequency of each issue, prompting a tele-triage call when thresholds are crossed. This collaborative approach has prevented several chronic skin infections in my pack.
| Brush Type | Pinch-Proof? | Risk to Undercoat | Best Use |
|---|---|---|---|
| Slicker Brush | No | High - can shred fibers | Short, dense top coats only |
| Wide-Tooth Comb | Yes | Low - gentle detangling | After raking, for mat removal |
| Pinch-Proof Brush | Yes | Minimal - preserves insulation | Routine daily checks |
At Home Dog De-Shedding: Leveraging Telehealth Consultations for Safe Practices
Before I begin a de-shedding session, I schedule a 15-minute video appointment with a certified pet-grooming specialist. The specialist watches me hold the de-shedding glove, then demonstrates the correct angle - roughly 45 degrees to the skin - and the amount of pressure (just enough to feel resistance without causing a tug). Real-time feedback lets me adjust instantly, reducing the risk of follicle irritation.
Recording the entire process with a high-resolution webcam adds a safety layer. After the session, I securely upload the footage through the clinic’s patient portal. The specialist reviews the video and provides a written analysis that highlights any missed spots, excessive pressure points, or tool misuse. This post-visit report often includes personalized tool recommendations based on my dog’s coat density and seasonal shedding patterns.
Telehealth also enables seasonal coat management plans. During spring, my vet suggested a lighter de-shedding schedule to prevent excessive loss of the undercoat, while in winter she recommended a short, focused session to keep the insulation dense. The data sharing platform tracks these adjustments, allowing me to see how each change influences shedding volume over months.
- Schedule a 15-minute pre-session video call.
- Record with high-resolution webcam for post-visit review.
- Use specialist feedback to fine-tune tool angle and pressure.
- Adjust de-shedding frequency seasonally via telehealth plan.
Dog Coat Maintenance: Building a Weekly Routine That Preserves Insulation
A daily “coat check” ritual has become a cornerstone of my grooming regimen. For five minutes each morning, I gently pat the fur from neck to tail. This simple action redistributes the natural oils produced by the skin, keeping the coat glossy and preventing dry patches that can lead to mat formation. While patting, I also scan for early signs of mats, skin irritation, or parasites.
Tool rotation prevents fatigue and balances fur health. I alternate weekly between a soft brush (to smooth the top layer), an undercoat rake (to lift loose hair), and a de-shedding glove (to remove surface debris). Switching tools reduces repetitive stress on the same set of pins and gives the coat a varied stimulation that encourages healthy hair growth.
Nutrition plays a hidden yet vital role. I supplement my dogs with an omega-3 rich formula, dosing according to weight and recording each administration in their electronic health record. Over six months, I observed a noticeable increase in coat sheen and a reduction in dry, flaky patches. Correlating supplement intake with grooming logs helped me fine-tune the dosage for optimal results.
- 5-minute daily coat pat for oil distribution.
- Weekly rotation of soft brush, rake, and glove.
- Monthly omega-3 supplement logged in health record.
- Track coat shine and skin health alongside nutrition.
- Adjust routine based on seasonal needs and vet feedback.
Frequently Asked Questions
Q: How often should I use a de-shedding tool on a double-coated dog?
A: Most experts recommend a short, focused session once a week during peak shedding seasons and a lighter touch once a month in off-season months. Adjust frequency based on observed fur loss and veterinarian guidance.
Q: Can I shave my double-coated dog in summer to keep them cool?
A: Shaving removes the protective undercoat that regulates temperature, often leading to overheating in winter and skin irritation in summer. The American Kennel Club advises against shaving and recommends regular brushing instead Is It OK to Shave Your Dog’s Coat in Summer?.
Q: What is the best brush for a Samoyed’s undercoat?
A: A pinch-proof brush with rounded pins is ideal. It lifts the undercoat without compressing it, preserving insulation and reducing heat-related skin issues.
Q: How can I tell if my grooming routine is damaging my dog’s coat?
A: Look for signs such as persistent redness, hair breakage, mat formation despite regular combing, or patches of thin fur. Document these signs in a shared log with your vet for early intervention.
Q: Are telehealth appointments effective for grooming advice?
A: Yes. Telehealth lets a veterinary dermatologist review live video or recorded sessions, provide tool recommendations, and detect early skin problems that might be missed during a home grooming session.